Tuesday, December 25, 2007

The Best Cheesecake you've ever had!

The Best Cheesecake you've ever had!


Crust:
1.5 cups of crushed Honey Graham Crackers
1.5 tbsp of melted butter
1/4 to 1/2 tsp of Cinnamon (Depending on your taste)
1/2 cup light brown sugar

Filling:
4 (8 oz) blocks of cream cheese
1 + 1/3 cup of white sugar
1 tbsp + 1 tsp vanilla
4 eggs (added one at a time)

  • Parchment paper, Nonstick Spray, Aluminum Foil
  • (Use a 10'' nonstick spring-form pan with the outside covered in tinfoil and the inside lined with parchment paper and lightly sprayed with nonstick spray)

    1. Preheat oven to 300.
    2. Mix crumbs, butter, cinnamon, and brown sugar; press firmly onto bottom and 2 inches up side of pan.
    3. Remove your cream cheese block from the foil and microwave for about 30 seconds up to 1 minute (cream cheese can cook and brown just like mozzarella cheese on a pizza - so be careful and don't over do it on the time in the microwave!)
    4. Place into mixer and mix until creamy. Add sugar in slowly. When sugar is completely incorporated, add in the vanilla, 1 tsp at a time. Add eggs, 1 at a time, mixing on low speed after each addition just until blended. Do NOT over mix your cheesecake! It will make it rise and fall like a souffle and then leave the possibility wide-open for your cheesecake to crack during the cooking process (which can also happen if the cheesecake is cooled too quickly).
    5. Pour into crust. Bake 1 hour 5 minutes to 1 hour 10 minutes or until center is almost set. Cool on the counter for at least one hour, preferably two. If you cover your cheesecake and refrigerate it while still warm, condensation will gather on the underside of the cover and drip onto the cake, making the first layer slimy and discolored -- so its important that you cool it slowly. By cooling too quickly -- not only do you have to worry about the slimy discoloration, but also the risk of having a cracked cheesecake and a huge trench to fill -- so don't skip this part......Trust me :)
    6. Run knife or metal spatula around side of pan to loosen cake. Chill completely for at least 4 hours (if not overnight) in the fridge before removing side of pan.
    7. After cooling, run the knife around the edges again. Unlatch the spring form around the circular bottom and gently lift it up the sides of the cake. Gently lift the cheesecake off of the spring form bottom and parchment using a large, thin spatula and transfer it to whatever you're going to serve it in. Do not top your cheesecake until its transferred to your serving platter or else you'll have a mess! You may top your cheesecake with whatever you want before serving, whether its a chocolate ganache, fresh fruit, a fruit topping, or just plain. My family loves it just the way it is. The first time I served it, I served it with a strawberry sauce. At the end of the night, I ended up taking home an empty cheesecake platter and a bowl full of strawberry sauce. If you're looking for something to serve this in, without having to use your spring form pan, I found some party platters that are perfect for Cheesecakes at Walmart. They have a thick aluminum bottom and a plastic top. Totally disposable! The only thing is -- wrap them in at least two layers of aluminum foil (the platter with the cheesecake inside) before transporting them anywhere. It will ensure your dessert will arrive safely and more intact!
    8. Store left overs in fridge! Enjoy!

    Monday, December 10, 2007

    Snickers Fudge

    Snickers Fudge


    For the first layer

    1 cup milk chocolate chips
    1/4 cup butterscotch chips
    1/4 cup peanut butter

    For the second layer

    4 tablespoons butter
    1 cup granulated sugar
    1/4 cup evaporated milk
    1 1/2 cups marshmallow creme
    1/4 cup peanut butter
    1 teaspoon vanilla
    1 1/2 cups chopped salted peanuts

    For the third layer

    14 ounce package caramel cubes
    1/4 cup heavy cream

    For the fourth layer

    1 cup milk chocolate chips
    1/4 cup butterscotch chips
    1/4 cup creamy peanut butter

    To make the first layer

    In a small saucepan over low heat, add milk chocolate chips, butterscotch chips and peanut butter. Stir often until completely melted and smooth. Pour mixture into the bottom of a 9 x 13" baking pan lightly coated with nonstick spray. Using an off-set spatula, spread the mixture to an even layer and place in the refrigerator until set.

    To make the second layer

    In a medium heavy saucepan, melt butter over medium-high heat. Mix in sugar and evaporated milk. Once it comes to a boil, let cook 5 minutes while stirring. Remove from the heat and quickly stir in marshmallow creme, peanut butter and vanilla. Stir in peanuts. Pour over the set chocolate layer and use an off-set spatula to gently spread mixture in an even layer. Place in the refrigerator until set.

    To make the third layer

    Place the unwrapped caramel cubes and heavy cream in a medium saucepan. Place over low heat and stir until the mixture has completely melted and is smooth. Pour in the pan and quickly spread to an even layer with an off-set spatula. Place in the refrigerator until set.

    To make the fourth layer

    In a small saucepan over low heat, add milk chocolate chips, butterscotch chips and peanut butter. Stir often until completely melted and smooth. Pour over the third layer and use an off-set spatula to spread to an even layer. Place in the refrigerator for at least 1 hour before cutting into squares.

    Wednesday, November 28, 2007

    Pizziti - Pizza & Baked Ziti ~ A new twist!

    1 box Penne Pasta

    1 small pack of pepperoni

    1/2 pound of mild italian sausage

    1 pound of ground beef

    1 small onion (diced)

    1/2 green bell pepper (diced)

    1 can of mushrooms or 1/2 cup of fresh baby bellas

    1 jar of spaghetti sauce

    1 jar of pizza sauce (Very important - do NOT substitute with spaghetti sauce -- it changes everything!!)

    16 oz of shredded motzerella cheese

    Cook your pasta until its almost tender.

    In a pan, saute your pepperoni and take it out after it gets just crisp. Do NOT over cook it. Drain the pepperoni on paper towels and pat dry. (Omitting this step will cause your dish to be too greasy ~ so its very important – don't skip it!!)

    In the pepperoni grease, cut the sausage from the casing and break it up with the ground beef and brown them. Drain the grease and add in onion, bell peppers, and mushrooms and saute until the vegetables are just tender.

    In a large bowl, add in the drained cooked pasta and the meat mixture and the jars of sauce. Fold in half of your cheese and most of your pepperoni. Pour into a baking dish and sprinkle with the remaining cheese and the remaining pepperoni. Bake for 30 minutes at 350! Enjoy!

    You can add anything you like to this that you enjoy on pizza (i.e. olives, jalapenos, ham, anything…)

    Tuesday, August 7, 2007

    Chocolate Bread Pudding

    Chocolate Bread Pudding
    Recipe Courtesy of Food Network
    2 1/2 cups cut-up stale bread
    1 teaspoon vanilla
    2 eggs
    2 tablespoons cocoa
    2 cups milk
    1 teaspoon cinnamon
    1/4 cup sugar
    3/4 cup chocolate chips
    Salt

    Preheat oven to 350 degrees. Place bread in a round, buttered, deep dish pie plate. In a medium bowl whisk together eggs, milk, sugar, a dash of salt, vanilla, cocoa, and cinnamon . Add chocolate chips. Pour over bread and gently mix. Let sit for 15 minutes, so bread can absorb mixture. Bake for 30 to 40 minutes until firm but not dry.

    Thursday, August 2, 2007

    Peanut Butter Pie

    No-Bake Peanut Butter Pie


    Prep Time: 15 min
    Total Time: 1 hr 15 min
    Makes: 8 servings

    1 cup creamy peanut butter

    4 squares BAKER'S Premium White Baking Chocolate (chopped fine)

    1-1/2 cups cold milk

    1 pkg. (4-serving size) JELL-O Vanilla Flavor Instant Pudding & Pie Filling

    1 tub thawed COOL WHIP Whipped Topping

    1 large banana , thinly sliced

    1 extra large HONEY MAID Graham Pie Crust (2 extra servings)

    Semi-sweet chocolate shavings on top for garnish!

    MICROWAVE peanut butter and chocolate in microwavable bowl on MEDIUM (50%) 1 - 1 + 1/2 minutes; stir until chocolate is completely melted and mixture is well blended.

    POUR milk into large bowl. Add dry pudding mix. Beat with wire whisk 2 minutes or until well blended. Add peanut butter mixture; beat until well blended. Gently stir in whipped topping.

    PLACE bananas on bottom of crust; cover with pudding mixture. Refrigerate at least 1 hour. Store leftover pie in refrigerator. Sprinkle with semi-sweet chocolate shavings (I used Baker's in a shaker canister)

    Tuesday, July 31, 2007

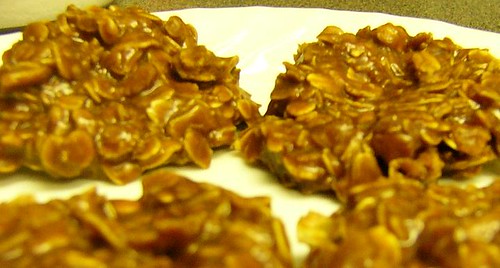
    Haystacks, Cow Pies, whatever you want to call them! No bake peanut butter oatmeal chocolate cookies!

    • 2 cups sugar
    • 1/4 pound margarine
    • 1/2 cup milk
    • 3 tablespoons cocoa
    • 1 teaspoon vanilla
    • 1/2 cup peanut butter (creamy or chunky)
    • 3 cups quick cooking oats

    Combine sugar, margarine, milk and cocoa in a 4 quart sauce pan. Cook at a full rolling boil for approximately 1 minute.

    Remove from heat, add vanilla and peanut butter. Stir well. Add oatmeal to mixture, combine thoroughly.

    Drop by spoonfuls onto waxed paper. Cool until firm.

    Friday, July 27, 2007

    Chocolate Praline Layer Cake

    Chocolate Praline Layer Cake

    Chocolate Praline Layer Cake

    Prep time: 25 min
    Cook Time: 2 hrs 15 min
    Yield: 16 servings

    Ingredients:

    Cake:
    1/2cup butter or margarine
    1/4cup whipping cream
    1cup firmly packed brown sugar
    3/4cup coarsely chopped pecans
    1package Pillsbury® Devils Food Cake
    1-1/4cups water
    1/2cup Crisco® Vegetable Oil
    3eggs
    Topping:
    1-3/4cups whipping cream
    1/4cup powdered sugar
    1/4teaspoon vanilla
    16whole pecans (optional)
    16chocolate curls (optional)

    Preparation Directions:

    1.Heat oven to 325°F. In small heavy saucepan, combine butter, 1/4 cup whipping cream and brown sugar. Cook over low heat just until butter is melted, stirring occasionally. Pour into two 8 or 9-inch round cake pans; sprinkle evenly with chopped pecans.
    2.Prepare cake as directed, using water, oil, and eggs. Carefully spoon batter over pecan mixture.
    3.Bake at 325°F. for 35 to 45 minutes or until cake springs back when touched lightly in center. Cool 5 minutes; remove from pans. Cool 1 hour or until completely cooled.
    4.In small bowl, beat 1 3/4 cups whipping cream until soft peaks form. Add powdered sugar and vanilla; beat until stiff peaks form.
    5.To assemble cake, place 1 layer on serving plate, praline side up. Spread with half of whipped cream. Top with second layer, praline side up; spread top with remaining whipped cream. Garnish with whole pecans and chocolate curls. Store in refrigerator.
    Thanks to pillsburybaking.com for the great recipe!

    Friday, July 20, 2007

    Cheesy Chicken Crescent Casserole

    3 pieces of chicken (boiled with salt/pepper + 2 tbsp butter and shredded)
    1 can (8 oz size) refrigerated crescent rolls
    1 can cream of chicken soup
    1/3 cup milk
    1 cup shredded cheddar cheese


    Preheat oven to 350F

    Separate crescent dough into triangles. Place about 3 Tbsp chicken on wide end of each triangle and roll to opposite point. Place all 8 spaced evenly in the bottom of a baking dish (either a 9 x 9 dish or a glass casserole dish) sprayed with nonstick spray.
    Bake for about 15 minutes or until the crescents start to turn golden brown.

    In a bowl, mix the soup and milk together until creamy. (You may need to microwave for up to 1 minute to make it pourable). Pour the soup mixture over the crescents stuffed with chicken and bake for 30 minutes.

    During the last five minutes, remove the dish from the oven and sprinkle with cheese. Pull out whenever the cheese is JUST melted and enjoy!

    Friday, July 13, 2007

    Herbal Tips: Lesson 2

    Cooking with Fresh Herbs

    What do gourmet cooks know that amateur chefs don't? They know that using fresh herbs can add that extra zest and sparkling flavor to mundane recipes. What follows isn't meant to be an exhaustive treatise on the use of herbs. Rather, we want to provide a few notes on some of the more popular herbs that many cooks may find helpful. The brief notes below will give you a quick start to using fresh herbs in your own culinary creations.

    Basil. There are several varieties of basil, but Sweet Basil is the most common. It has a warm mint and clove taste with citrus and anise notes. The leaves will blacken shortly after cutting, so be sure to chop them at the last minute and add them late in the cooking process - just before serving if possible. Basil loves tomatoes. Use basil with olive oil, garlic, parmesan cheese and pine nuts to make pesto, or pair it with any number of Italian dishes. Chop it or tear it for use in vegetable soups, butter sauces for fish, or just add it directly to a salad for an aromatic and delicious ingredient. You can even steep whole basil leaves in cream to make an interesting whipped cream to serve on summer fruit salads.

    Bay. This herb has a strong, deep savory flavor with the essence of nutmeg and warm spices. Bruise one or two bay leaves and add them at the beginning of the cooking. Remove bay leaves from the dish before service because they aren't good to eat. Use this herb to flavor soups, stews, ragouts and braising liquids. Include bay leaves with parsley and thyme to make a "bouquet garni" for flavoring stocks. You can even steep it in milk or cream to add perfume to a custard.

    Chervil. A fragile very light anise flavor with some of parsley's pepperiness. Use chervil liberally since the flavor is not strong. Chervil makes a nice garnish and a delicate complement to cream soups, shellfish, lean white fish, eggs, and Spring vegetables. Add it to your dishes just before serving so you won't lose the flavor.

    Chive. Long narrow and hollow leaves with a mild fresh onion flavor. Chop it finely or snip it and use it liberally. It is a classic with baked potatoes. Pair it also with eggs, cheese and cream. A nice garnish for soups, salads and sauteed vegetables. Smear it into softened butter for corn on the cob.

    Cilantro. Since the seeds of Cilantro are called Coriander, this herb is sometimes called fresh Coriander. It is also called Chinese parsley. It has a tangy flavor with citrus overtones. Use it liberally and just before serving since the flavor pales with cooking. It makes a zesty match for many Asian, Latin American and Indian dishes. Excellent with chile and lime. Brightens fresh fruit or tomato salsas. Add it to a pesto to serve with grilled shrimp or steak.

    Dill. Sometimes called dill weed to distinguish it from the more powerful dill seed. It has a mellow parsley flavor with warm spice notes. Pick off the the feathery fronds or chop lightly and use it just before serving or, use it even on cold dishes. This herb is used commonly in Scandinavian and Eastern European dishes. Add it to cold potato salads, cucumbers and devilled eggs or in hot potato soup, steamed beets, omelets and dishes that use sour cream like Beef Stroganoff.

    Marjoram. Bold floral perfume with overtones of mint and pepper. Use this herb judiciously because it can be potent. Chop it roughly and add it near the end of the cooking cycle. It is from the same family as Oregano so it lends itself well to Italian cuisine. Good for perfumed roasted meats, braising liquids and tomato sauces. Adds flavor effectively to beans, cooked mushrooms and spinach.

    Oregano. The most common variety is Greek Oregano but there is also a variety from Mexico. This is a bold peppery tasting herb with hints of pine. Like Marjoram it is powerful and used sparingly, normally chopped roughly. It is used on nearly every pizza made. It works quite well with lemon and garlic in Greek dishes. It can accent red meats, roasted chicken or hearty dishes like Greek Moussaka and French Ratatouille. Put it in a marinade or salad dressing when you want a bold flavor.

    Parsley. The two most common varieties are the flat leafed Italian parsley and the bushy curly parsley. Parsley has a subtle celery and mild pepper taste. This versatile and widely used herb is found in many Middle Eastern, French and Italian dishes. Parsley is a great "all purpose" herb for soups, sauteed vegetables, meats and sea foods. It is one of the ingredients in the classic "bouquet garni" for flavoring stocks or braises. Parsley is also a popular garnish with nearly any dish.

    Rosemary. This herb has a distinctive appearance - its leaves look like pine needles and have a strong pine and lemon flavor. Be judicious in using rosemary because its flavor can dominate a dish or even become bitter. Pull the leaves from the stems and chop them coarsely. Add them early in the cooking cycle. It is great for accenting root vegetables like potatoes and excellent on roasted or grilled meats, particularly lamb. Add rosemary with olive oil and garlic for a marinade. Put whole sprigs or rosemary in stews, roast chicken or caramelized onions to add a piney accent. It even works in some baked goods like bread.

    Sage. Garden sage is the most common variety, but purple sage and pineapple sage are also used frequently. Sage has a strong and potent earthy flavor, so it can dominate some dishes and eeven taste medicinal if overused. Like other strong herbs it works best when added early in the cooking cycle. It is a very common herb in Thanksgiving turkey dressings. You can pair it with veal or pork. Use it to add an earthy quality to onions, squash, white beans and root vegetables. Fry whole sage leaves in butter for a tasty garnish.

    Spearmint. There are several mint varieties, such as peppermint, apple mint, chocolate mint and pineapple mint, but spearmint is the most commonly used in cooking. It has a cooling and sweet taste. Use spearmint liberally and add it near the end of the cooking cycle. Add it to almost any savory dish from pasta to fish. Spearmint is used often with lamb, and is also excellent with peas, new potoatoes and fruit salads. Steep leaves in cream for making minty chocolate dishes.

    Tarragon. This powerful herb has the tase of sweet and spicy licorice. Tarragon should be used sparingly and added near the end of cooking. It is a popular ingredient in herbal vinegars and for marinades and vinaigrettes. Tarragon is an ingredient in French Bearnaise sauce and chicken with Tarragon. It works nicely also with lobster, eggs and spring vegetables.

    Thyme. This popular herb has a subtle pine taste, with notes of spicy lemon. Use thyme liberally but carefully because it can overwhelm some subtle flavors. Thyme complements meats, seafood and vegetables of many kinds. It can be used in a bouquet garni to flavor stocks, sauces, soups or Coq au Vin. You can add thyme to slow roasted tomatoes, braises and pasta sauces or even infuse whole sprigs in cream for caramel sauces.

    Thursday, July 12, 2007

    Brownie Bottom Cheesecake

    Prep Time: 40 min
    Total Time: 5 hr 40 min
    Makes: 16 servings

    4 squares Unsweetened Baking Chocolate
    1/2 cup (1 stick) butter or margarine
    2-1/4 cups sugar, divided
    5 eggs, divided
    1/4 cup milk
    2 tsp. vanilla, divided
    1 cup flour
    1/2 tsp. salt
    3 pkg. (8 oz. each) Cream Cheese, softened
    1/2 cup Sour Cream
    1. PREHEAT oven to 325°F. Microwave chocolate and butter in large microwaveable bowl on HIGH 2 min. or until butter is melted. Stir until chocolate is completely melted. Add 1-1/2 cups of the sugar; mix well.
    2. ADD 2 of the eggs, one at a time, mixing on low speed after each addition just until blended. Add milk and 1 tsp. of the vanilla; mix well. Combine flour and salt. Gradually add to chocolate mixture, mixing after each addition just until blended. Spread evenly into greased and floured 9-inch springform pan. Bake 25 min.
    3. BEAT cream cheese, remaining 3/4 cup sugar and remaining 1 tsp. vanilla in large bowl with electric mixer on medium speed until well blended. Add sour cream; mix well. Add remaining 3 eggs, one at a time, mixing on low speed after each addition just until blended. Pour over brownie layer in pan (Filling will come almost to top of pan.)
    4. BAKE 55 min. to 1 hour or until center is almost set. Run knife or metal spatula around rim of pan to loosen cake; cool before removing rim of pan. Refrigerate 4 hours or overnight. Let stand at room temperature 30 min. before serving. Store leftover cheesecake in refrigerator.

    Chocolate Lover's Cheesecake


    Prep Time: 10 min

    Total Time: 3 hr 50 min

    Makes: 8 servings


    2 pkg. (8 oz. each) PHILADELPHIA Cream Cheese, softened
    1/2 cup sugar
    1/2 tsp. vanilla
    2 eggs
    4 squares BAKER'S Semi-Sweet Baking Chocolate, melted, slightly cooled
    1 OREO Pie Crust (6 oz.)
    1. PREHEAT oven to 325°F. Beat cream cheese, sugar and vanilla in large bowl with electric mixer on medium speed until well blended. Add eggs; mix just until blended. Stir in melted chocolate. Pour into crust.
    2. BAKE 40 minutes or until center is almost set; cool.
    3. REFRIGERATE several hours or overnight. Store leftover cheesecake in refrigerator.

    PHILADELPHIA® 3-STEP® Double Chocolate Layer Cheesecake


    Prep Time: 10 min
    Total Time: 3 hr 50 min
    Makes: 8 servings

    2 pkg. (8 oz. each) PHILADELPHIA Cream Cheese, softened
    1/2 cup sugar
    1/2 tsp. vanilla
    2 eggs
    3 squares BAKER'S Semi-Sweet Baking Chocolate, melted, cooled slightly
    1 OREO Pie Crust (6 oz.)
    4 fresh strawberries, halved
    1/2 cup thawed COOL WHIP Whipped Topping
    1. PREHEAT oven to 350°F. Beat cream cheese, sugar and vanilla in large bowl with electric mixer on medium speed until well blended. Add eggs, 1 at a time, beating on low speed after each addition just until blended.
    2. REMOVE 1 cup of the batter to small bowl; stir in melted chocolate. Pour into crust; top with remaining plain batter.
    3. BAKE 40 minutes or until center is almost set. Cool. Refrigerate 3 hours or overnight. Top with whipped topping and strawberries just before serving. Store leftover cheesecake in refrigerator.

    Chocolate Ribbon Pie


    Prep Time: 15 min
    Total Time: 4 hr 15 min
    Makes: 8 servings

    4 oz. (1/2 of 8-oz. pkg.) PHILADELPHIA Cream Cheese, softened
    2 Tbsp. sugar
    1 Tbsp. milk
    1 tub (8 oz.) COOL WHIP Whipped Topping, thawed, divided
    1 OREO Pie Crust (6 oz.)
    2 cups cold milk
    2 pkg. (4-serving size each) JELL-O Chocolate Flavor Instant Pudding & Pie Filling
    1. BEAT cream cheese, sugar and 1 Tbsp. milk in large bowl with wire whisk until smooth. Gently stir in half of the whipped topping. Spread on bottom of crust.
    2. POUR 2 cups milk into large bowl. Add dry pudding mixes. Beat with wire whisk 2 minutes or until well blended. (Mixture will be thick.) Pour over cream cheese layer.
    3. REFRIGERATE 4 hours or until set. Just before serving, garnish with remaining whipped topping and 2 Tbsp. shaved chocolate. Store leftover pie in refrigerator.

    Triple Layer Chocolate Pie


    2 cups cold milk
    2 pkg. (6-serving size each) JELL-O Chocolate Flavor Sugar free Instant Pudding & Pie Filling
    1 Chocolate graham cracker crust or an oreo crust (oreo pictured above - chocolate graham pictured below)
    1 tub (8 oz.) COOL WHIP Sugar Free Whipped Topping, thawed, divided


    1. POUR milk into large bowl. Add dry pudding mixes. Beat with wire whisk 2 min. (Mixture will be thick.)

    2. SPOON 1-1/2 cups of the pudding onto bottom of crust. Gently stir half of the whipped topping into remaining pudding.

    3. SPREAD evenly over pudding layer in crust; top with the remaining whipped topping. Refrigerate 3 hours or until set. Store leftover pie in refrigerator.

    Did it need sprucing up? Absolutely not, but I did anyway! I sprinkled this one with Baker's chocolate shavings in a canister and dusted it lightly with coco powder.

    Huge hit with my family and one of the most diabetic friendly chocolate pies I've eaten in a while although it is not COMPLETELY sugar free because of the crust and the chocolate shavings (which the shavings can be omitted like pictured above).

    Easy Grasshopper Pie


    Prep Time: 15 min
    Total Time: 4 hr 45 min
    Makes: 8 servings
    1 cup boiling water
    1 pkg. (4-serving size) JELL-O Brand Lime Flavor Gelatin
    1/4 cup cold water
    2 Tbsp. green creme de menthe
    2 Tbsp. white creme de cacao liqueur
    2 cups thawed COOL WHIP Whipped Topping
    1 OREO Pie Crust (6 oz.)

    1. STIR boiling water into gelatin in large bowl at least 2 min. until completely dissolved. Stir in cold water and liqueurs.
    2. Refrigerate 1-1/2 hours or until slightly thickened (spoon drawn through leaves definite impression). Gently stir in whipped topping.
    3. SPOON into pie crust.
    4. REFRIGERATE 3 hours or overnight. Store leftove pie in refrigerator.

    Kitchen Tip:

    Special Extra Garnish with chocolate curls. To make the curls, place 1 wrapped square of BAKER'S Baking Chocolate in microwave. Microwave on DEFROST 1 minute to warm slightly. Or, let the wrapped chocolate stand for several hours in a warm place, such as on top of a refrigerator or under a strong light. Carefully pull a vegetable peeler over the smooth surfaces of the chocolate square. Scrape along the bottom for long curls or the sides for short curls. Use a toothpick to lift the curls without breaking them. Store in covered container in refrigerator or freezer until ready to use.

    Thanks to kraftfoods for this lovely recipe!

    Summer Lemon-Berry Pie

    Summer Lemon-Berry Pie


    Prep Time: 15 min
    Total Time: 5 hr min
    Makes: 8 servings

    • COUNTRY TIME Lemonade Flavor Drink Mix
    • 1/2 cup water
    • 1 pt. (2 cups) strawberry or raspberry sorbet, softened
    • 2 cups thawed Whipped Topping
    • 1 Graham Pie Crust (6 oz.)
    • 1/2 cup each: blueberries, raspberries and sliced strawberries or 1 and 1/2 cup of just strawberries
    1. MEASURE drink mix into cap just to 1-qt. line; pour into large bowl. Add water; stir until mix is completely dissolved.
    2. ADD sorbet; beat with electric mixer on low speed until well blended. Gently stir in whipped topping. Freeze 45 min. or until mixture is thick enough to mound. Spoon into crust.
    3. FREEZE at least 4 hours or overnight until firm. Remove from freezer 15 min. before serving. Let stand at room temperature to soften slightly.
    4. Serve topped with the berries. Store any leftover pie in freezer.

    Thanks to kraftfoods for this recipe!

    Wednesday, June 27, 2007

    Mexican Layered Dip

    Mexican Layered Dip


    Prep Time: 10 min
    Total Time: 3 hr 10 min
    Makes: 5 cups dip or 40 servings, 2 Tbsp. dip and 1 oz. chips each


    1 pkg. (8 oz.) PHILADELPHIA Neufchatel Cheese, 1/3 Less Fat than Cream Cheese , softened
    1 Tbsp. TACO BELL® HOME ORIGINALS® Taco Seasoning Mix
    1 cup TACO BELL® HOME ORIGINALS® Thick 'N Chunky Salsa
    1 cup drained canned black beans , rinsed
    1/2 cup chopped green onions
    1 cup KRAFT 2% Milk Shredded Reduced Fat Cheddar Cheese
    1 cup shredded lettuce
    2 Tbsp. sliced pitted ripe olives
    3 pkg. (13 oz. each) baked tortilla chips

    BEAT Neufchatel cheese with electric mixer on medium speed until creamy. Add seasoning mix; beat until well blended. Spread onto bottom of serving plate or 9-inch pie plate.
    LAYER remaining ingredients over Neufchatel cheese mixture; cover.
    REFRIGERATE at least 1 hour before serving. Serve with tortilla chips.

    Frosty Orange Dream Squares

    Frosty Orange Dream Squares

    Prep Time: 20 min
    Total Time: 3 hr 20 min
    Makes: 24 servings, one square each


    40 NILLA Wafers, finely crushed (about 1-1/2 cups)
    1/4 cup (1/2 stick) butter , melted
    2 cups cold milk
    2 pkg. (4-serving size each) JELL-O Vanilla Flavor Instant Pudding & Pie Filling
    1 tub (8 oz.) COOL WHIP Whipped Topping , thawed, divided
    2 cups orange sherbet, softened

    LINE 13x9-inch pan with foil, with ends of foil extending over sides of pan. Mix wafer crumbs and butter. Press firmly onto bottom of prepared pan; set aside until ready to use.
    ADD milk to dry pudding mixes in medium bowl. Beat with wire whisk 2 min. or until well blended. Gently stir in half of the whipped topping. Spoon evenly over crust. Refrigerate 10 min. Add remaining whipped topping to sherbet; stir with wire whisk until well blended. Spoon evenly over pudding layer; cover.
    FREEZE at least 3 hours or overnight. Use foil handles to remove dessert from pan before cutting into squares to serve. Store leftover dessert in freezer.


    Spinach & Cheese Dip

    Spinach & Cheese Dip


    Prep Time: 10 min
    Total Time: 1 hr 10 min
    Makes: 3 cups or 24 servings, 2 Tbsp. each

    1 pkg. (8 oz.) PHILADELPHIA Cream Cheese , softened
    1/2 cup KRAFT Mayo Real Mayonnaise
    1/3 cup sliced green onion s
    1 pkg. (10 oz.) frozen chopped spinach , thawed, well drained
    1 cup KRAFT Natural Italian* Cheese Crumbles
    1/2 cup chopped roasted red pepper s

    1. BEAT cream cheese, mayo and half of the onions in medium bowl with electric mixer on medium speed until well blended. Add spinach; mix until just blended.

    2. STIR in cheese crumbles and peppers; cover.

    3. REFRIGERATE at least 1 hour. Sprinkle with remaining onions just before serving.


    Sunday, June 10, 2007

    Black Bottom Banana Cream Pie


    Black-Bottom Banana Cream Pie

    Recipe Rating: Prep Time: 10 min Total Time: 1 hr 10 min Makes: 8 servings
    • 2 Tbsp butter or margarine
    • 1 graham cracker crust
    • 1/4 bag of milk chocolate chips
    • 2 large bananas, sliced
    • 1 pkg. (4-serving size) JELL-O Vanilla Flavor Instant Pudding & Pie Filling
    • 1 cup cold milk
    • 1 (8 oz) tub of thawed Whipped Topping
    1. MELT chocolate chips and butter in a microwave safe bowl for 1 minute. Stir until smooth. and the chocolate is completely melted. Spread or drizzle evenly onto bottom of crust (I even went up the sides); top with bananas. Set aside.
    2. PREPARE dry pudding mix with 1 cup cold milk and mix in almost all of the whipped topping (reserving about 1/5 of the tub). Pour evenly over bananas. Top with the reamining whipped topping and spread it out evenly. Refrigerate at least 1-2 hours before serving or up to 24 hours. Sprinkle with extra graham cracker crumbs as a garnish. Store leftover pie in refrigerator.
    Thanks to kraftfoods for this wonderful recipe!
    Although I altered it for my taste. :)

    Hole-In-One Cake

    I found this recipe on www.kraftfoods.com and I HAD to share it! I thought it was such a CUTE idea for Father's Day!
    Hole-in-One Cake

    Recipe Rating: Prep Time: 45 minTotal Time: 3 hr 45 minMakes: 15 servings


    • 1 pkg. (2-layer size) yellow or white cake mix
    • 1 cup boiling water
    • 1 pkg. (4-serving size) JELL-O Brand Lime Flavor Gelatin
    • 1/2 cup cold water
    • 2 squares BAKER'S Semi-Sweet Baking Chocolate, melted
    • 2 cups thawed COOL WHIP Whipped Topping
    • 1 red and 1 green chewy fruit snack roll
    • 4 pretzel sticks
    • 1 JET-PUFFED Miniature Marshmallow, cut into quarters


    PREPARE and bake cake mix in 13x9-inch baking pan as directed on package. Cool completely. Invert cake onto large platter; remove pan. Using small sharp knife, cut and scoop out a shallow free form "golf course" from center of cake. Reserve removed cake for another use.
    STIR boiling water into dry gelatin in medium bowl until completely dissolved. Stir in cold water. Refrigerate about 1 hour until slightly thickened (the consistency of unbeaten egg whites). Pour thickened gelatin into center of cake. Refrigerate 3 hours or until set.


    STIR slightly cooled melted chocolate into whipped topping until well blended. Frost borders and side of cake with whipped topping mixture. Cut out small triangle from the red fruit roll. Attach to pretzel stick. Place in center to resemble flag. Using sharp small knife, cut green fruit roll into strips and attach to remaining pretzel sticks to form trees. Use some of the darker reserved crumbs to make sand traps. Roll marshmallow quarter into ball and place near flag for the golf ball. Store any leftover cake in refrigerator.

    Saturday, June 9, 2007

    The Cooking Bible ~ "The Joy of Cooking"


    The Joy of Cooking. . . Its not just a title, its everything about the kitchen and cooking that you need to know, with the exception of how to care for your cookware, which you can turn to me for! ;-) This cookbook of epic proportion has been around for 75 years now. . . wow!

    This book contains 4,500 recipes and has sections about everything from herbs to poultry, beef to desserts, grilling to sauces and marinades, and even canning and pickling. Its 1,132 pages of EVERYTHING you thought you needed to learn or know and even stuff you DIDN'T know you needed to know! It even gives you illustrated lessons on table settings, cocktails, measurements, and substitutions. It even tells you the different grades of meat, what they're used for, the difference in cooking method for each grade.

    There is one thing I found last night that I don't agree with ~ and that's their method for cheesecake. They say not to "over mix" because it adding all of that air into the batter makes it cook like a souffle and rise and fall and sometimes crack. It won't crack, if you cool it slowly like I told you to. . . For me and my recipe ~ I say - Beat the hell out of it! Make it rise and fall. It's what makes the cake itself light and fluffy and not too overbearing.

    The advice I can give you about this difference of opinion is to try it both ways and see which you prefer. The worst that's going to happen is you're going to have a fabulous cheesecake. Caramel, chocolate, nuts, and cheesecake. . . Heck, it doesn't get any better than that!


    Here is an exert from the book:

    Food Tips

    1. The ice with which a drink is shaken, stirred, or served is an important ingredient. If the water used to make ice has a strong taste before being frozen, this will be carried into the drink. For the clearest and best-tasting cubes, start with filtered water, if possible, or let the water sit for several minutes before freezing.
    2. When making sandwiches to be eaten later (as for a lunchbox), keep them from becoming too soggy by packing additions like tomato, lettuce and pickle slices in separate plastic bags. Add the extras to the sandwiches just before eating.
    3. To extract citrus juice easily, first roll the fruit firmly beneath your palm over a hard surface, exerting pressure. Cut the fruit in half crosswise. When juicing only one fruit, the most efficient tool is the citrus reamer. When juicing several fruits, use a citrus hand press or an electric juice extractor.
    4. To shell hard-cooked eggs, crack the shell and roll the egg between the palms of the hands to free the thin tough skin from the egg and make shelling easier. If eggs are very fresh (less than 3 days old), they are more difficult to shell. Quickly cooling hard-boiled eggs and then thoroughly chilling them before peeling helps, as does holding eggs in the refrigerator for 7 to 10 days before hard-boiling. Hold the egg under a stream of cool water as you peel to remove any bits of broken shell.
    5. To test scallops for freshness, see that they have a sweetish odor. Those that are sold shucked may be soaked in a bath of water and preservatives such as tripolyphosphate; this process both extends their shelf life and artificially increases the weight of the scallop. You want to make every effort to buy unsoaked or "dry" scallops. They have a cleaner taste, and they brown better when sautéed because they contain less water. Be suspicious of any sea scallops that are pure white, a good indication that they have been soaked; the natural color of sea scallops ranges from white to off-white to pale shades of orange, pink, and tan.
    6. To adapt standard recipes for the slow cooker: estimate 2 hours on low or 1 hour on high in a slow cooker for every 30 minutes of cooking time in the original recipe. Just as for a meat stew or roast, brown the meat and sauté the vegetables to maximize flavor before combining them in the insert. Vegetables, especially root vegetables, cook more slowly than meat and should be placed in the bottom of the insert so they can heat directly in the cooking liquid. To compensate for the steam that will collect, decrease the liquid called for in the oven or stovetop recipe by 1/2 cup. Add dairy-based ingredients such as milk, cream, or cheese during the last thirty minutes of cooking, as they will curdle if cooked too long.
    7. To test mussels for freshness, try to slide the two halves of the shell across each other. If they budge, the shell is probably filled with mud, not mussel. Discard any mussels with broken shells or shells that will not close after putting into the freezer for a minute or two.
    8. To minimize fish tastes and odors, use lemon, wine, vinegar, ginger, spring onions, or garlic in the marinating or cooking. To remove the odor of fish from utensils and dishcloths, use a solution of 1 teaspoon baking soda to 1 quart water. Pans may be washed in hot suds, rinsed and dried, and then rinsed with a little vinegar. Rinse again with water. To remove the odor of fish from the hands, rub them with lemon juice, vinegar or salt before washing.
    9. To store a cut avocado, allow the seed to remain embedded, spread the edges with lemon juice or mayonnaise, cover well with plastic wrap and refrigerate.
    10. Fresh or frozen pineapple, kiwi, papaya, honeydew, figs and ginger -- and their juice -- cannot be added to a gelatin salad. They contain enzymes that will inhibit jelling. Canned pineapple has been cooked and may be used as is.
    11. All cream soups, whether bound with egg or not, are ruined by boiling, so be sure to heat just to the boiling point, or cook them in the top of a double boiler [arrow] over -- not in -- boiling water. Reheat them this same way. Many cream soups are equally good served hot or cold; when serving cold, adjust the seasoning before serving.
    12. Avoid turning pancakes more than once, and continue cooking only until the second side is lightly browned. Pancakes are best served at once, but if this is not possible, keep them on a baking sheet, separated by paper towels, in a 200ºF oven. Never stack one on the other without the protection of a towel -- the steam they produce will make the cakes flabby.
    13. Always fill out a baking sheet, placing cookies of even size and thickness about 1 inch apart, unless otherwise indicated. On a partially filled sheet the heat is drawn to the area where the cookies lie, and the batch may burn on the bottom. If you haven't enough dough on your last baking to fill a whole baking sheet, reverse a pie pan or turn a small baking pan upside down.
    14. The placement of the pans during baking is very important. Bake 1 sheet of cookies at a time, at least 2 inches from the oven walls and on the center oven rack. If using two smaller pans, see that they are spaced evenly from the walls and from each other. Heat should circulate all around the pans. Few ovens are so nearly perfect that they will brown a large sheet evenly. During the baking process, do rotate the sheet halfway through cooking for even baking. Oven thermostats are also variable, so watch closely, especially when baking molasses and brown-sugar cookies, which burn easily. When cookies are done, remove them from the baking sheet at once or they will continue to cook. Should they harden on the pan, return the baking sheet for a moment to the oven before trying to remove them.
    15. Whenever foods show the slightest signs of spoilage, such as leaking packages, off-odors, mold, bubbling or unnaturally cloudy liquids, bulging or rusty cans, or liquid that spurts out when a can is opened, please accept the best advice we know: If in doubt, throw it out. Do not taste even the smallest bit. It is not worth the risk getting sick or worse.
    16. Some foods simply do not hold up to freezing well, and the changes it causes in them make them undesirable for later use. Freezing, for example, will ruin gelatins, mayonnaise, and many meringues. Cooked pastas and rice, if frozen alone, will turn mushy and develop a warmed-over taste. Milk sauces may separate or even curdle, as will sour cream, custards, and cream fillings. Vegetables that are very high in water content will have a significant change in texture upon thawing, becoming quite limp and water-logged. This includes lettuce, celery, cabbage, cucumbers, endive, and radishes.
    17. Any fruit dried outdoors must be brought inside at sundown at night to protect it from night dews. No food should be dried outdoors in air-polluted areas.
    18. For best results, it is imperative that vegetables and fruit for pickling are in prime condition and are harvested no more than 24 hours in advance. If cucumbers have been held longer, they tend to become hollow during processing.
    19. When washing fruits and vegetables, scrub particularly around the stems, blossom ends, and crevices -- these are hiding places for bacteria.
    20. The flavor of almost all pickled produce is improved if it is stored 6 weeks before using.
    21. The Sundae is a variation of the ice cream soda. Nineteenth Century frowners did not approve of drinking soda water on the Sabbath, but the treat was so popular, a dish of ice cream and syrup (or sauce) without the soda was created and named for the sacred day. Frowners continued to be offended by the name and eventually it was changed to sundae.


    If you would like to purchase "The Joy of Cooking" you can find it at your local Walmart, or go here:

    http://www.walmart.com/catalog/product.do?product_id=4909587

    Friday, June 1, 2007

    Pina Colada


    3 oz of coconut rum (malibu)
    1/2 cup of crushed pineapple
    1/2 cup of coconut cream
    2 cups of ice


    Blend pineapple & coconut cream first... then add rum... and then add ice.

    Top with whip cream and a cherry if desired. Garnish with fresh pineapple.

    Lava Flow


    2 oz Malibu® coconut rum
    6 large strawberries
    1 banana
    1/4 cup crushed pineapple


    1 cup of ice


    Blend ice, banana, coconut cream, and pineapple juice in a blender and set aside. In the bottom of a hurricane glass, stir together rum and strawberries.

    Pour banana/coconut/pineapple/ice mix slowly into the glass. The strawberry/rum mix should creep up the sides of the glass to make a wonderful looking (and tasting) summertime cocktail!

    You can blend this all together. Its an awesome drink!


    Serve in: Hurricane Glass

    Thursday, May 31, 2007

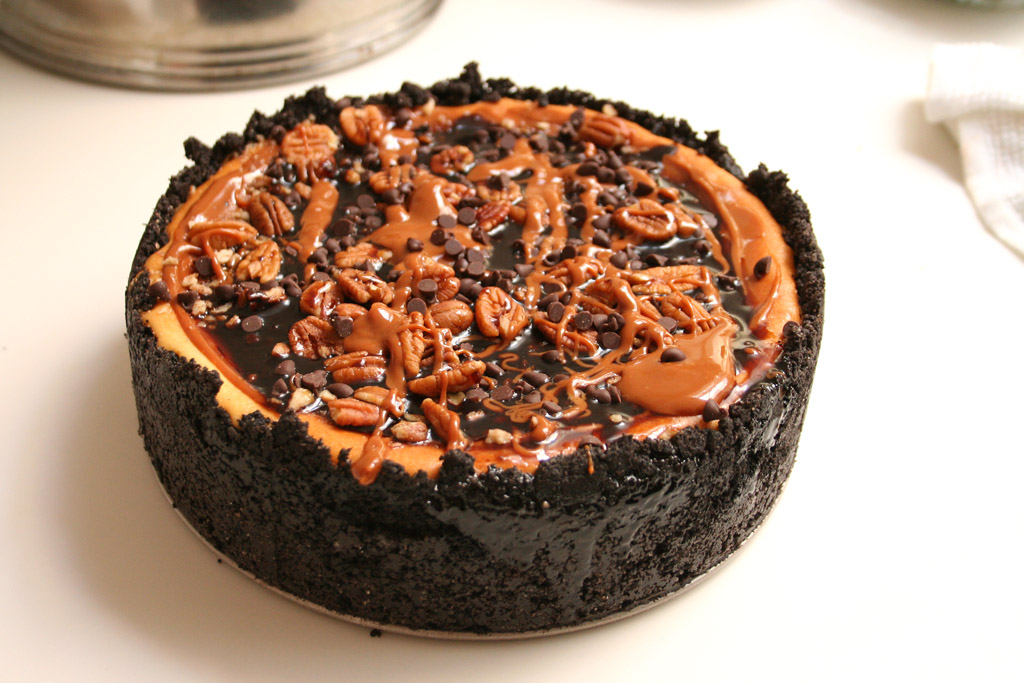
    Turtle Cheesecake


    • 1 package of oreos ground down into crumbs (use either a food processor or blender)
    • 6 Tbsp. butter or margarine, melted
    • 1 squeeze bottle of Hershey's caramel sundae ice cream topping (Do NOT use SMUCKERS! It hardens in the oven and makes your crust so hard you can't even eat it OR 1 bag of kraft individually wrapped caramels + 2 tbsp of milk or evaporated milk
    • 1 bag of chopped pecans
    • 3 pkg. (8 oz. each) Cream Cheese or neuchatel cheese, softened
    • 1 cup sugar
    • 1 Tbsp. vanilla
    • 3 eggs
    • 1/2 bag of milk chocolate morsels
    • Parchment paper, Nonstick Spray, Aluminum Foil

    (Use a 9'' nonstick spring-form pan with the outside covered in tinfoil and the inside lined with parchment paper and lightly sprayed with nonstick spray)

    1. Preheat oven to 300.
    2. Mix crumbs and butter; press firmly onto bottom and 2 inches up side of pan.
    3. Pour half of the caramel and pecans into the crust. Refrigerate 10 minutes.
    4. Remove your cream cheese block from the foil and microwave for about 30 seconds up to 1 minute (cream cheese can cook and brown just like motzarella cheese on a pizza - so be careful and don't over do it on the time in the microwave! -- The whole point of microwaving it is just getting it warm - not hot - so you will have a smooth cheesecake, free of lumps).
    5. Place into mixer and mix until creamy. Add sugar in slowly. When sugar is completely incorporated, add in the vanilla, 1 tsp at a time. Add eggs, 1 at a time, mixing on low speed after each addition just until blended. Do NOT overmix your cheesecake! It will make it rise and fall like a souffle and then leave the possibility wide-open for your cheesecake to crack during the cooking process (which can also happen if the cheesecake is cooled too quickly).
    6. Pour over caramel layer in crust. Bake 1 hour 5 minutes to 1 hour 10 minutes or until center is almost set. Cool on the counter for at least one hour, preferably two. If you cover your cheesecake and refrigerate it while still warm, condensation will gather on the underside of the cover and drip onto the cake, making the first layer slimey and discolored -- so its important that you cool it slowly. By cooling too quickly -- not only do you have to worry about the slimey discoloration, but also the risk of having a cracked cheesecake and a huge trench to fill -- so dont skip this part......Trust me :)
    7. Run knife or metal spatula around side of pan to loosen cake. Chill completely for at least 4 hours (if not overnight) in the fridge before removing side of pan.
    8. After cooling, run the knife around the edges again. Unlatch the spring form around the circular bottom and gently lift it up the sides of the cake. Gently lift the cheesecake off of the spring form bottom and parchment using a large, thin spatula and transfer it to whatever you're going to serve it in. Do not top your cheesecake until its transferred to your serving platter or else you'll have a mess! If you're looking for something to serve this in, without having to use your spring form pan, I found some party platters that are perfect for Cheesecakes at Walmart. They have a thick aluminum bottom and a plastic top. Totally disposable! The only thing is -- wrap them in at least two layers of aluminum foil (the platter with the cheesecake inside) before transporting them anywhere. It will ensure your dessert will arrive safely and more intact!
    9. Pour over the remaining caramel and pecans (reheat if using the kind you have to melt) Melt chocolate chips + 2 tbsp of milk in the microwave for 15-30 seconds until they are a consistency you can drizzle over the cake. Store leftover cheesecake in refrigerator.
    10. You may even top it with a few more chocolate chips! Its your cheesecake! Indulge how you wish!


    This recipe is VERY forgiving and can be altered depending on your needs.

    For example:


    For a 10'' spring-form pan, you'll need:


    1 package of oreos pureed to just crumbs
    1 stick of butter


    4 bars of cream cheese
    4 eggs
    1 & 1/3 cup sugar
    1 tbsp + 1 tsp vanilla

    (caramel & nuts don't change)

    Bake an extra few minutes until the middle just barely jiggles.


    For a 12'' spring-form pan, you'll need:

    1 package of oreos pureed to just crumbs
    1 stick of butter

    5 bars of cream cheese
    5 eggs
    1 & 2/3 cup sugar
    1 tbsp + 2 tsp vanilla
    (caramel & nuts don't change)


    Bake an extra few minutes until the middle just barely jiggles.


    No spring-form pan ~ No problem!

    Turn it into little individual cheesecakes with a muffin tin!
    Cut your recipe to:

    1 cup of oreo crumbs
    3 tbsp butter
    2 bars of cream cheese
    2 eggs
    2/3 cup of sugar
    2 tsp vanilla

    Press a spoonful of your cookie mixture into cupcake liners in a muffin tin and spoon over the cheesecake mixture and bake for 20 minutes.


    Not in the mood for chocolate?? (Although *I* MYSELF could not imagine that. . .)

    You can substitute the oreo and butter for plain graham cracker crumbs and butter and top the cheesecake with your choice of either fresh fruit or fruit topping or even PIE filling!


    For the individual cheesecakes: You can substitute the cookie mixture and put in a Nilla wafer in place of the crust and top with fruit topping! (pictured above with blueberry pie filling).


    You cannot go WRONG with this recipe!
    Trust me!
    Everything here is:

    Jennifer Tested
    Mother Approved